
Once your Production Sheet has information to display in a text box, creating the text box and saving it as a template is quite simple.
To begin, open the Text tool on count 0 of the drill.

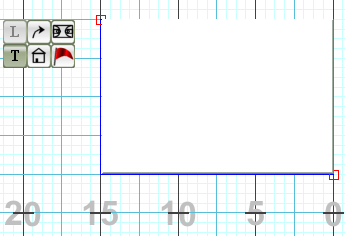
Create the text box shape and size by clicking twice on the field, once for the upper-left corner, and second for the lower-right corner. You can reposition the text box by clicking and dragging the edit handle in the upper-left corner, and re-size the text box by clicking and dragging the edit handle in the lower right corner.
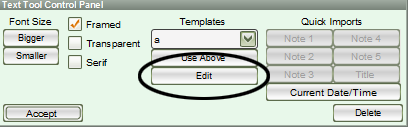
Once you have the size and shape of your desired text box, click the Edit button in the Text Tool Control Panel.
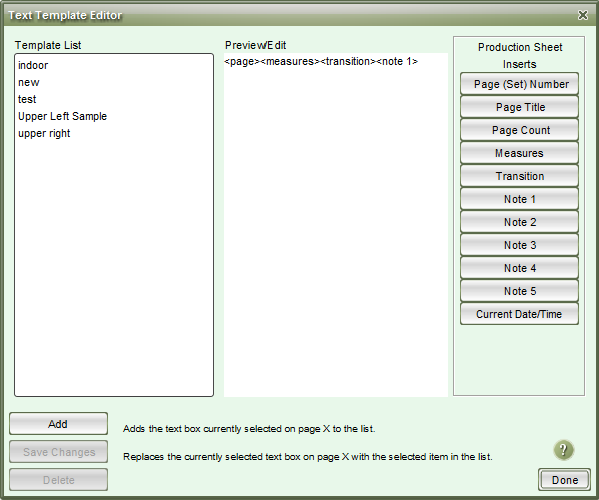
The Text Template Editor window will appear. This is where we define what information will display from the Production Sheet in the text boxes.

The buttons that run down the right side of the Text Template Editor, appropriately named Production Sheet Inserts, are the list of available options to input in a text box. You’ll notice each button has it’s own column in the Production Sheet. This is because all of the information in the Production Sheet is at your disposal for use in text boxes.
If you click a button, it will add that Production Sheet value to the Preview/Edit section of the Text Template Editor window. Let’s say we wanted to have the Page Number, Measures, Transition, and Notes 1 column in a text box on every page. Here’s what it would look like if we clicked each of those respective buttons, in order:
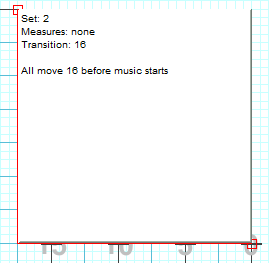
And here’s what that text box would look like:
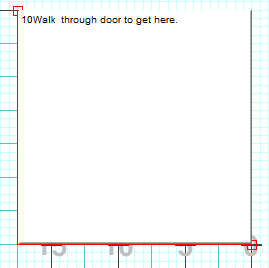
Not exactly the effect we were looking for! This can be prevented by adding a little formatting to the Production Sheet Inserts. Let’s go back to the Text Template Editor and format the information to make it more legible.
You can type in the Preview/Edit section of the Text Template Editor window. This allows you to add text before or after the Production Sheet Inserts, this way you’ll know what numbers are what, as well as add line breaks for visibility (if desired). So with a little formatting, and using the exact same Production Sheet Inserts, we can make this:
Look like this:

Which will result in this on the page:
Once you have the template designed as you wish, press the Add button in the Text Template Editor window. You will be prompted to name the template. Enter the template name, press OK, then Done in the Text Template Editor window.
The template will then be available for use in any future drill by selecting the template from the Templates menu in the Text Tool Control Panel and pressing the Use Above button. Press Accept in the Text Tool Control Panel to apply the text box.
Post your comment on this topic.